智能门铃助理 — ESPBell

ESPBell是一个基于ESP12F模块的智能门铃项目。它使用ESPBell-Lite开发板,该开发板包含ESP8266芯片、摄像头、扬声器和麦克风。https://mp.weixin.qq.com/cgi-bin/readtemplate?t=tmpl/video_tmpl&vid=wxv_3251263471233613825

功能包括:

  • 实时视频传输
  • 双向语音通话
  • 人体检测
  • 触摸按钮
  • 远程控制

使用方法如下:

  1. 下载项目代码并安装依赖项。
  2. 将ESPBell-LITE开发板连接到电脑。
  3. 编译并烧录代码到开发板。
  4. 按照说明配置 Wi-Fi 连接。

优势包括:

  • 使用ESP8266芯片,具有较高的性能和低功耗。
  • 集成了摄像头、扬声器和麦克风,可实现实时视频传输、双向语音通话和人体检测等功能。
  • 支持触摸按钮和远程控制,使用方便。

不足之处包括:

  • 开发板的价格相对较高。
  • 视频传输的质量受网络环境的影响。

总体而言,该项目是一个功能强大且易于使用的智能门铃项目。它适合家庭、办公室和其他场所使用。

以下是该项目的部分亮点:

  • 使用ESP8266芯片,具有较高的性能和低功耗,可满足实时视频传输、双向语音通话和人体检测等功能的需求。
  • 集成了摄像头、扬声器和麦克风,可实现丰富的功能。
  • 支持触摸按钮和远程控制,使用方便。

该项目具有良好的开发潜力,可以进一步扩展功能,例如:

  • 添加更多传感器,例如 PIR 传感器、门磁传感器等,实现更智能的功能。
  • 支持云端存储,实现视频录像和回放。
  • 支持 AI 识别,实现人脸识别、车辆识别等功能。

源代码:

https://github.com/IoToutpost/ESPBell-LITE
https://file.daihuo.qq.com/mp_cps_goods_card/v57/index.html

谷歌Sheets和ESP8266构建的考勤系统

用户刷卡后,系统会与包含用户列表的谷歌表单进行核对。

如果用户获得授权,LCD上会显示用户的姓名、接入类型和自定义留言,并发出“嘟”的一声。系统还将考勤数据记录在谷歌Sheet中,供以后查看和分析。

开始之前,你得有一个Google账户,且所在网络可以顺利登录Google。

https://mp.weixin.qq.com/cgi-bin/readtemplate?t=tmpl/video_tmpl&vid=wxv_2903425061842321412

主要材料:

RFID RC522

https://www.aliexpress.us/item/2251832760608169.html

esp8266

https://www.aliexpress.us/item/2251832470086446.html

lcd1602

https://www.aliexpress.us/item/2251832499297742.html

breadboard

https://www.aliexpress.us/item/2251832028089611.html

相关源码:

https://github.com/unreeeal/ESP/tree/master/ESP-RFID-GOOGLE

注:这里ESP32和ESP8266的使用场景是差不多的,两者都可以实现类似功能。

基于ESP8266的智能配电板

This is the final curcuit: 

This is components you need for the project:

PZEM-004T: https://s.click.aliexpress.com/e/_9hYStD

ESP8266: https://s.click.aliexpress.com/e/_97j7kp

Resistors: https://s.click.aliexpress.com/e/_9AslPB

Electrolytic Capacitor: https://s.click.aliexpress.com/e/_A2atvx

PCB 6X8: https://s.click.aliexpress.com/e/_d7XpQnS

Pin Header: https://s.click.aliexpress.com/e/_AUvLzT

Female PCB Header: https://s.click.aliexpress.com/e/_AClQip

5V relay module: https://s.click.aliexpress.com/e/_AAXY9i

1602 I2C Display: https://s.click.aliexpress.com/e/_AF3L2o

Compilation

Use core 2.7.4 for this project (Tested with this version)  upd: 08/12/2021 made some changes, tested with 3.0.2 (works)

please download the necessary libraries: https://github.com/electrical-pro/SmartBoard/blob/main/libraries.zip copy them from the archive to: C:\Users\Documents\Arduino\libraries

P.S. I modified the LiquidCrystal_I2C library, I removed Wire.begin(5, 14);

Uploading files from data folder

The project uses SPIFFS to store files on ESP8266, upload them to the ESP8266 (read about SPIFFS if you dont know what that is.) 

 If you don’t see this option install the plugin from here: https://github.com/esp8266/arduino-esp8266fs-plugin

Connecting to router

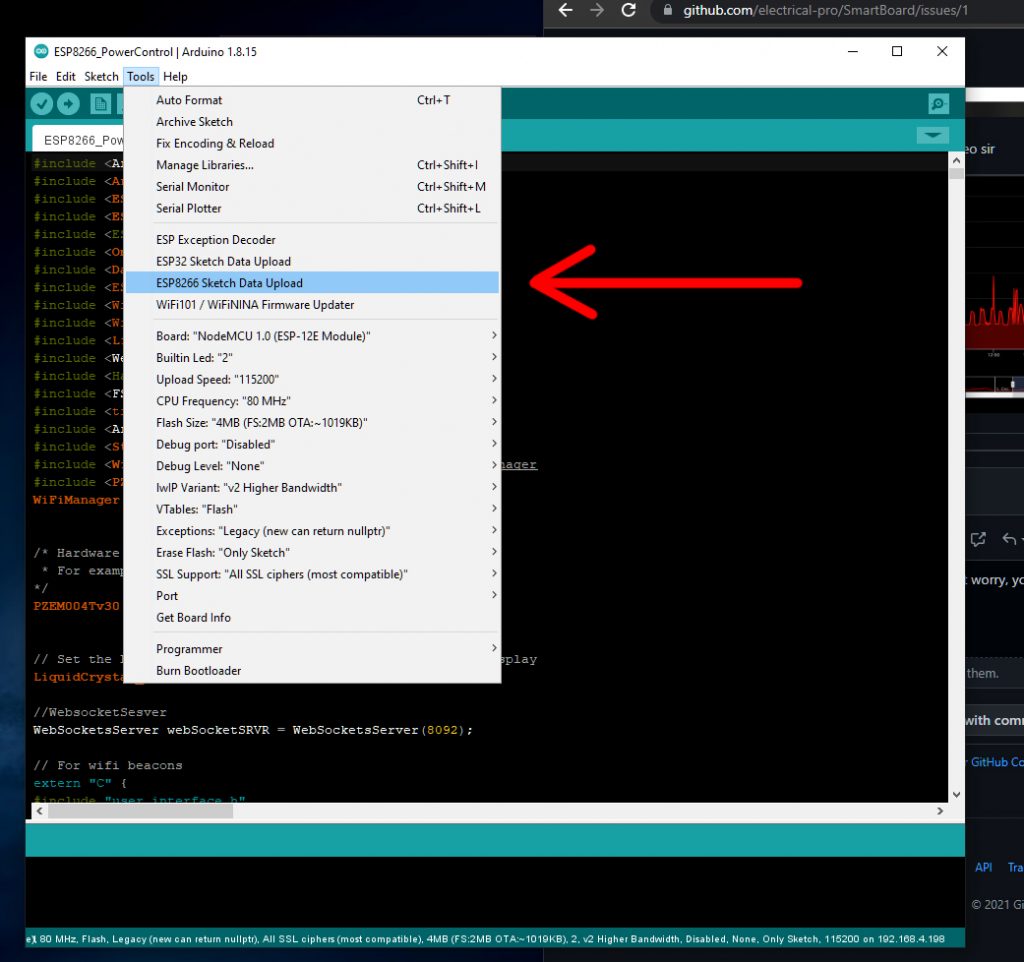
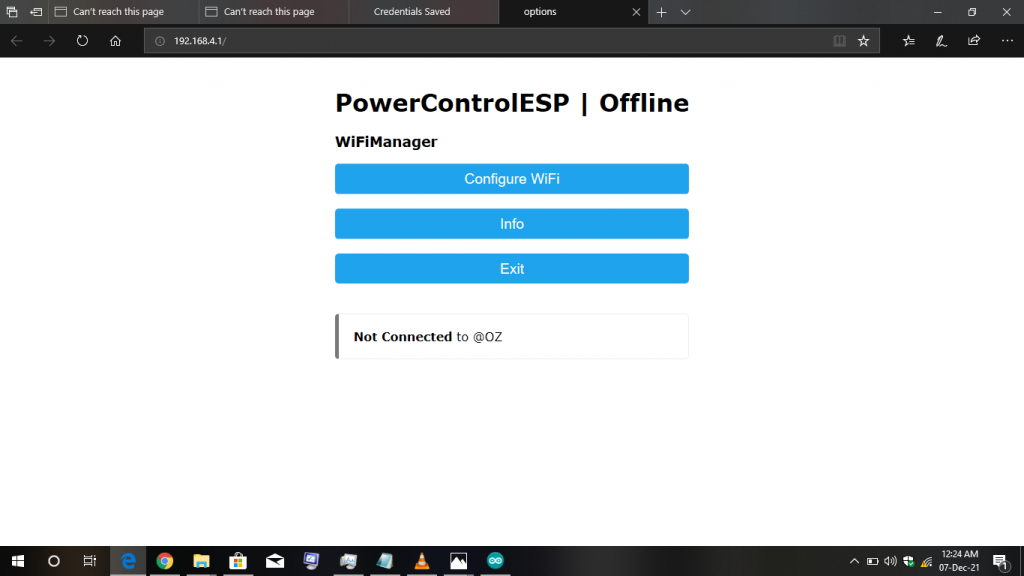
After flashing connect to “PowerControlESP | Offline” pass is “PowerControlPass” then go to 192.168.4.1 (WI-Fi manager) and connect to your Wi-Fi router. 

Power server is at 192.168.x.x:8089 (port is 8089)

Very unusual authorization that I implemented

If it says “The file exists, but you are not authorized!” – is a simple safety feature that I implemented, so in order to access files you need to go to a secret URL first http://192.168.x.x:8089/me (you can program another one) When you go to http://192.168.x.x:8089/me it puts a cookie in your browser and you become an authorized user

to make it work right set it to false in the sketch

// set it to false, and then get auth cookie by going to 192.168.x.x:8089/me
bool PublicAccess = true;  // authorization 

If it is true it only allows you to go to http://192.168.x.x:8089

if it is false nothing is allowed unless you go to http://192.168.x.x:8089/me first

Serial

Note that I use Serial for PZEM004Tv30 module

PZEM004Tv30 pzem(&Serial);

Other information goes to Serial1 not Serial (so you will not see things in serial monitor)

Serial1.begin(115200);