不管是手机电脑,还是带触摸屏的终端设备,简单易用的图形界面,总是很受欢迎。
而提起Python下的图形界面开发,大家一定都会想到 PyQt 和 wxPython、Kivy 等经典模块。
不过我们这次要介绍的“guizero”,是一个非常易用的GUI库,能让初学者快速、轻松地为他们的程序创建图形界面。
安装很简单:
pip3 install guizero
这里先来个基础的例子。
from guizero import App, Text, PushButton
app = App(title="IoT前哨站")
intro = Text(app, text="试着用guizeo开发图形界面")
ok = PushButton(app, text="Ok")
app.display()
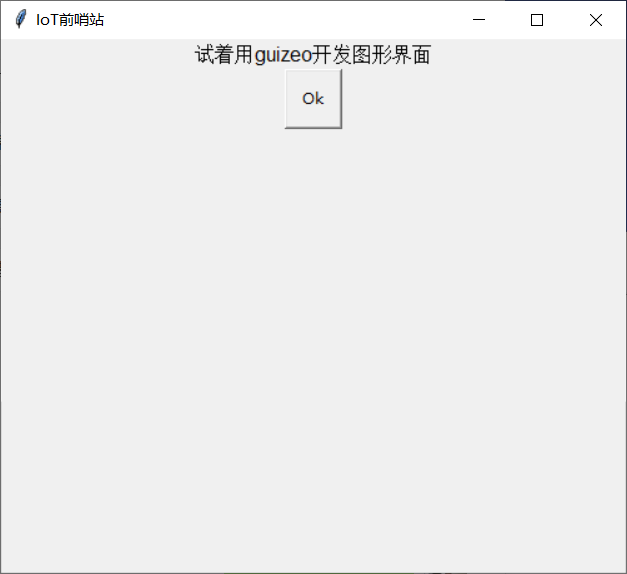
这个例子应该很容易懂,先设置窗体、标题,然后放入一个文本框和一个按钮。
由于文本框没有设置内容,所以不太看得出来,整个窗体只能发现一个按钮孤零零的杵那儿。
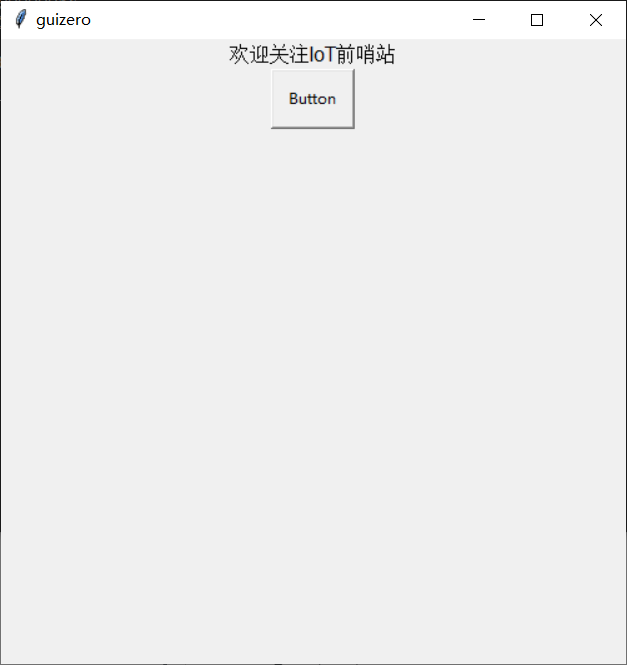
下面我们试着给按钮加功能,让它做一个显示字符的操作(准备让文本框发挥作用了)。
from guizero import App, Text, PushButton

def say_hello():
    text.value = "欢迎关注IoT前哨站"

from guizero import App, Text, PushButton
app = App()
text = Text(app)
button = PushButton(app, command=say_hello)
app.display()
当你单击 Button 按钮时,原本空着的文本框会显示“欢迎关注IoT前哨站”。
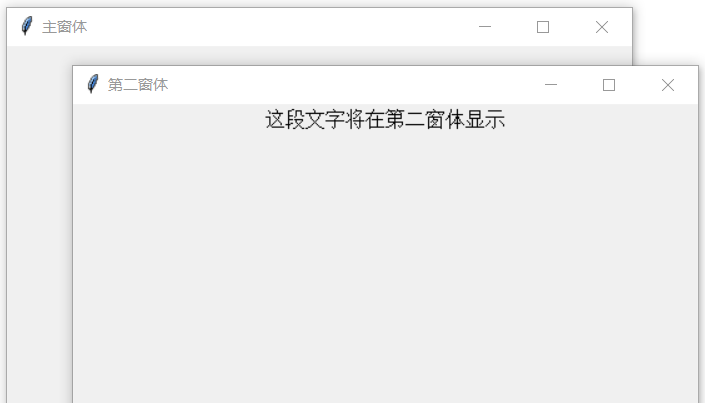
如果你的程序功能比较复杂,需要另外一个窗体展示内容的时候……
from guizero import App, Window, Text
app = App(title="主窗体")
window = Window(app, title="第二窗体")
text = Text(window, text="这段文字将在第二窗体显示")
app.display()
默认情况下,guizero是自动布局,或者通过修改窗体内各部件的align属性,来调整它们的基本方位,但那肯定不够。
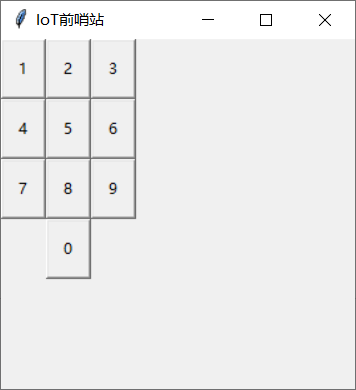
更细致一点的布局方式 —— 网格。
from guizero import App, PushButton
app = App(title="IoT前哨站",layout="grid")
button1 = PushButton(app, text="1", grid=[0,0])
button2 = PushButton(app, text="2", grid=[1,0])
button3  = PushButton(app, text="3", grid=[2,0])
button4  = PushButton(app, text="4", grid=[0,1])
button5  = PushButton(app, text="5", grid=[1,1])
button6  = PushButton(app, text="6", grid=[2,1])
button7  = PushButton(app, text="7", grid=[0,2])
button8  = PushButton(app, text="8", grid=[1,2])
button9  = PushButton(app, text="9", grid=[2,2])
button0  = PushButton(app, text="0", grid=[1,3])
app.display()
通过grid参数来修改各部件的[x,y]坐标,以此改变它们在窗体中出现的位置。
你也可以通过在网格参数中指定范围,使部件跨越多个列或行。这些都是可选的,但必须用[x,y,xspan,yspan]这样的格式来指定它们。
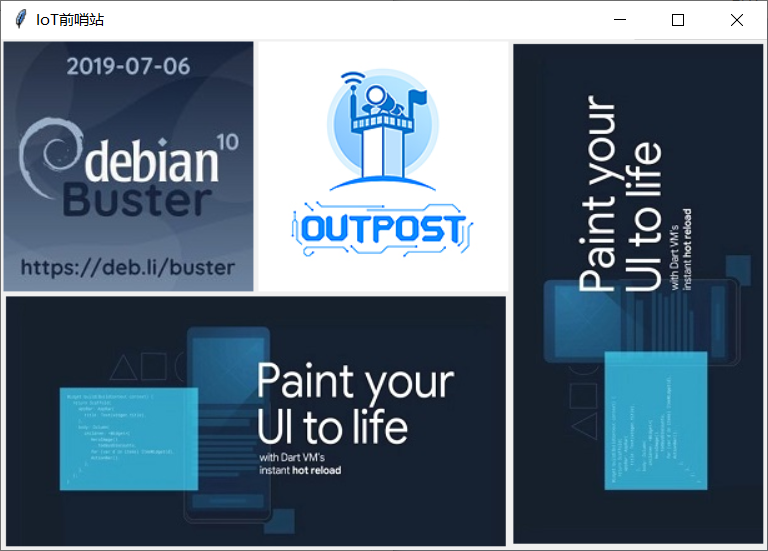
比如下面这个图片摆放的例子。
from guizero import App, Picture
app = App(title="IoT前哨站",layout="grid")
picture1 = Picture(app, image="Debian.jpg", grid=[0,0])
picture2 = Picture(app, image="IotOutpost.jpg", grid=[1,0])
picture3 = Picture(app, image="wide.jpg", grid=[0,1,2,1])
picture4 = Picture(app, image="tall.jpg", grid=[2,0,2,2])
app.display()
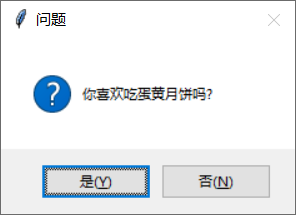
弹出框大家也经常在用,一般经典的就是询问、提示和警告。
from guizero import App
app = App(title="月饼提问")
build_a_snowman = app.yesno("问题", "你喜欢吃蛋黄月饼吗?")
if build_a_snowman == True:
app.info("月饼", "这就给你拿一块过来。")
else:
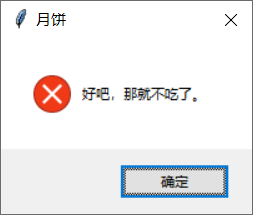
app.error("月饼", "好吧,那就不吃了。")
app.display()

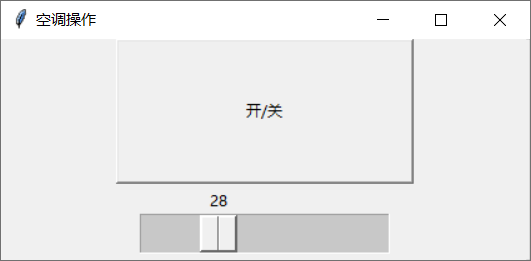
再看一个经典的滑动条,假设要调整空调的温度。
from guizero import App, PushButton, Slider
app = App(title="空调操作")
button = PushButton(app, text="开/关",width=30, height=5)
slider = Slider(app, width=200, height=30)
app.display()
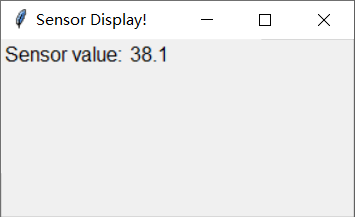
下面来一个读取传感器数值并每秒钟刷新的例子。当然,为了方便演示,里面用的是随机数。
from guizero import *
import random
def read_sensor():
    return random.randrange(3200, 5310, 10) / 100
def update_label():
    text.value = read_sensor()
    # recursive call
    text.after(1000, update_label)

if name == 'main':
    app = App(title='Sensor Display!',
              height=100,
              width=200,
              layout='grid')

title = Text(app, 'Sensor value:', grid=[0, 0])
text = Text(app, "xx", grid=[1, 0])
text.after(1000, update_label)
app.display()
最后,来一个带菜单选项的例子。
 from guizero import *

 def switch_screen(switch_to):
     hide_all()
     switch_to.show()

 def hide_all():
     for screen in all_screens:
         screen.hide()

 app = App("多选择框运用", layout="grid")
 all_screens = []

 创建一个菜单区域
 menu = Box(app, grid=[0,0], layout="grid")
 menu.tk.width = 900
 menu.bg = "gray"

 选项1
 option1 = Box(app, grid=[1,0])
 text1 = Text(option1, text="这是列表区的内容")
 combo = Combo(option1, options=["树莓派","小熊派","香橙派"])
 all_screens.append(option1)

 选项2
 option2 = Box(app, grid=[1,0])
 text2 = Text(option2, text="这是滑动框")
 slider = Slider(option2)
 all_screens.append(option2)

 option1_button = PushButton(menu, text="列表区", \
 command=switch_screen, args=[option1], grid=[0,0], align="left")
 option2_button = PushButton(menu, text="滑动框", \
 command=switch_screen, args=[option2], grid=[0,1], align="left")
 hide_all()
 all_screens[0].show()
 app.display()
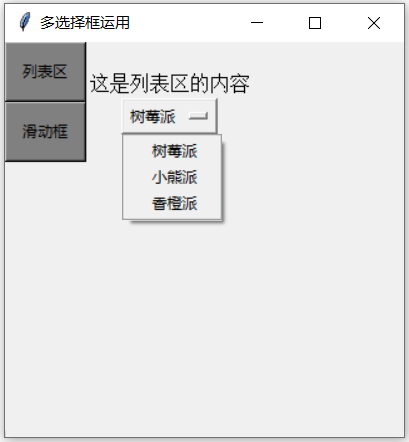
左侧灰色的两个菜单选项,分别是“列表区”和“滑动框”,单击任意一个按钮后会出现相应内容,列表区中有个下拉式清单,而滑动框点进去是与其对应的部件。
其他的用法大家可以继续挖掘,不管你的系统是 Windows 还是 Mac、Raspbian Linux,Guizero均可支持。
虽然看着似乎有一点糙,但好在上手快。哪怕你是一个刚开始研究图形界面的 Python 开发者,也能轻松掌握。
作者:王文文,前51CTO安全频道主编,RedHat认证工程师,华为HCIP-IoT认证工程师。