原作:Sandeep Mistry
编译:IoT前哨站
Slack是一款在线协作软件,可以让你与团队成员进行聊天、文件传送、语音/视频通话等功能。Slack还可以整合多种工具和服务,如电子邮件、Google Drives、Twitter、Trello等,以提高工作效率和自动化任务。Slack是世界各地公司和个人的首选平台,拥有超过20万付费客户和77个财富100强企业的使用者。它有App方便大家在手机或平板电脑上使用。
这次要实现的树莓派Pico W远程控制机器人,简单来说,就是我们在手机上用Slack发消息,指挥Pico W帮我们干活。

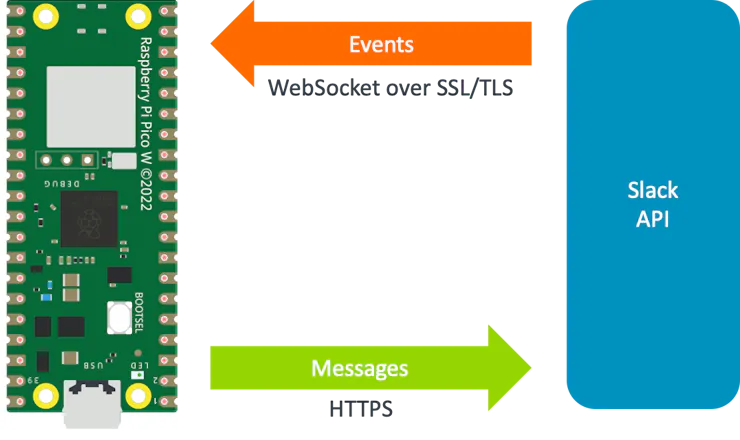
Slack 的 chat.postMessage API 可将消息从开发板发送到 Slack 频道。Slack 为应用和机器人提供了一个事件 API,用于响应 Slack 上的活动。由于开发板不能从公共互联网直接访问,因此无法使用公共 HTTP webhook。我们必须使用Slack 的Socket Mode。Socket Mode使应用和机器人能够使用动态的WebSocket 接收事件。动态套接字连接的URL可以通过Slack的apps.connections.open API获取。
Pico W与Slack API 接收事件和发送消息的通信机制:
要完成上述操作,你必须先有Slack令牌。
配置 Slack
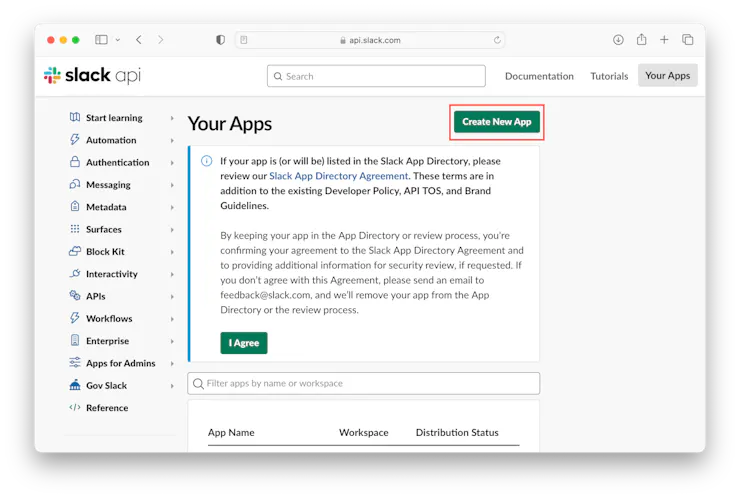
在 Web 浏览器中,访问 https://api.slack.com/apps 并使用您的 Slack 凭据登录。单击“创建新应用”按钮。
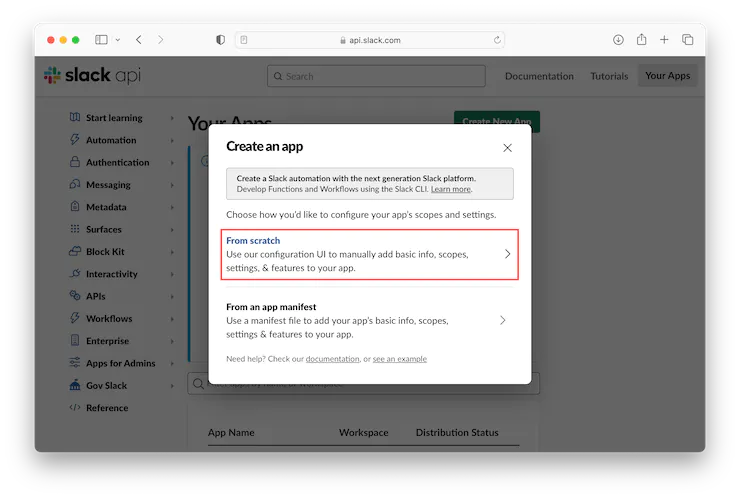
单击“从头开始”选项。
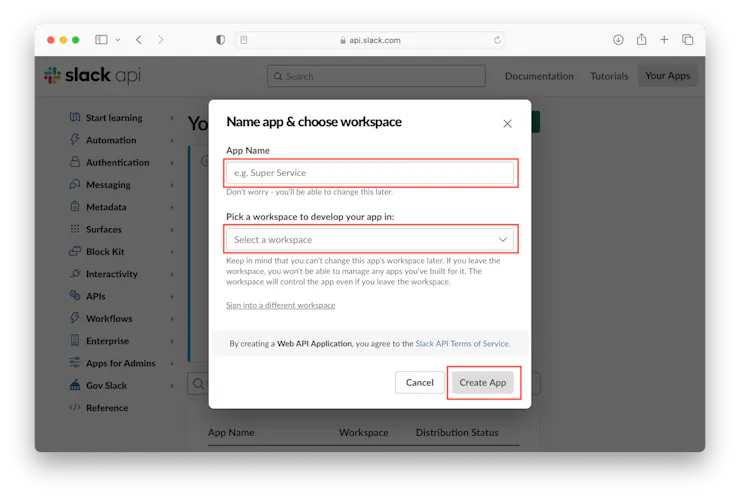
输入应用程序的名称(例如“Pico W”),为应用程序选择一个工作区,然后单击“创建应用程序”按钮。
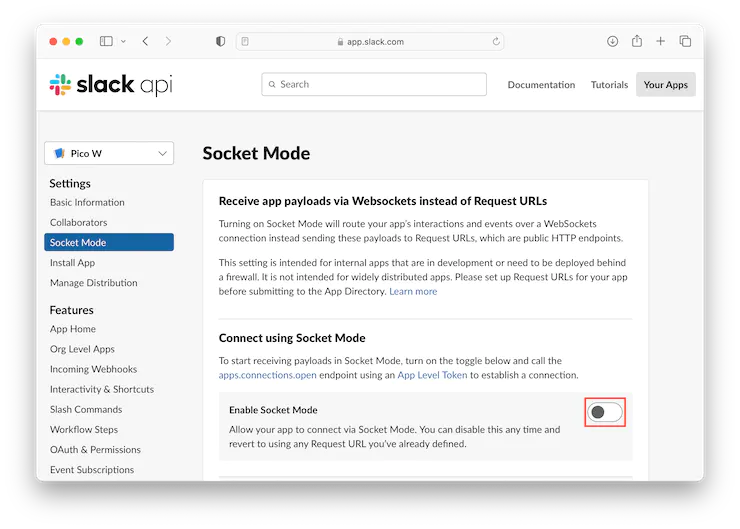
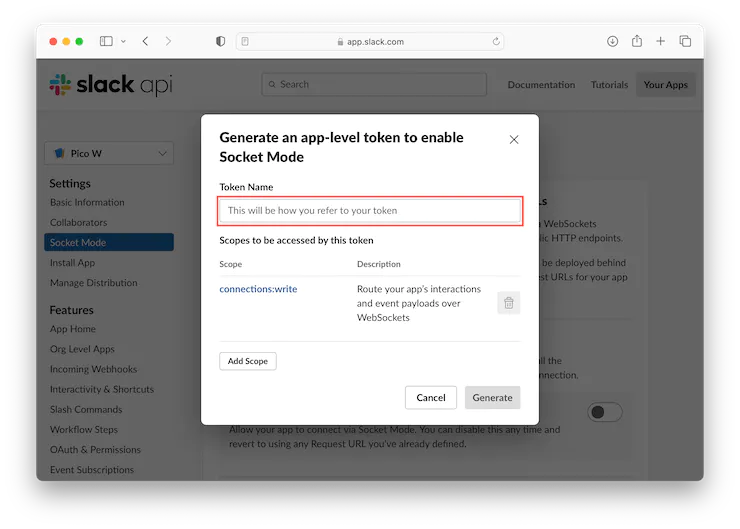
单击左侧的“Socket Mode”部分,然后单击切换到“启用Socket Mode”。
输入应用级令牌的“Token Name”,例如“Pico W app”,然后单击“生成”按钮。
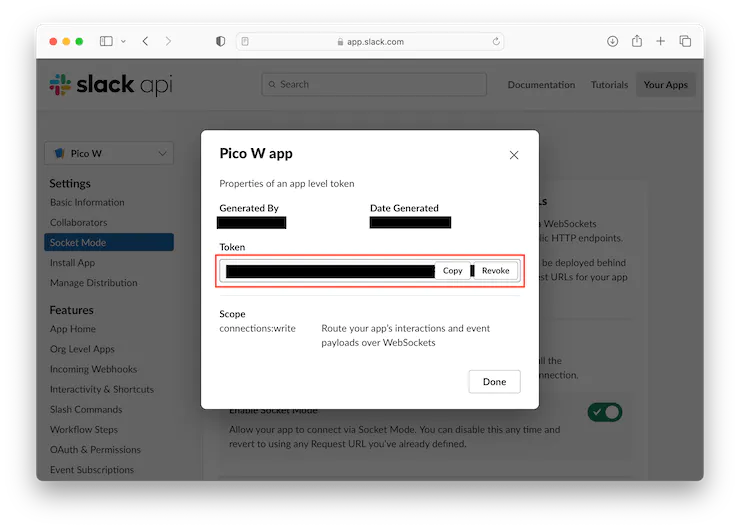
生成并显示应用级令牌,复制该值并保存以备将来使用,然后单击“完成”按钮。
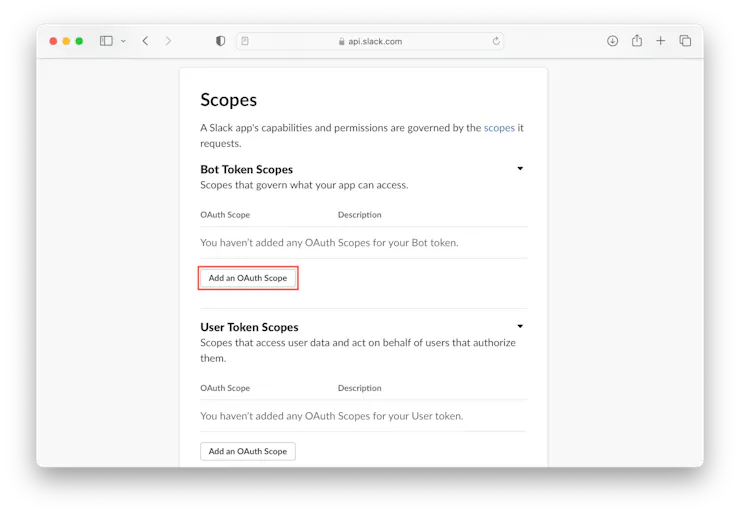
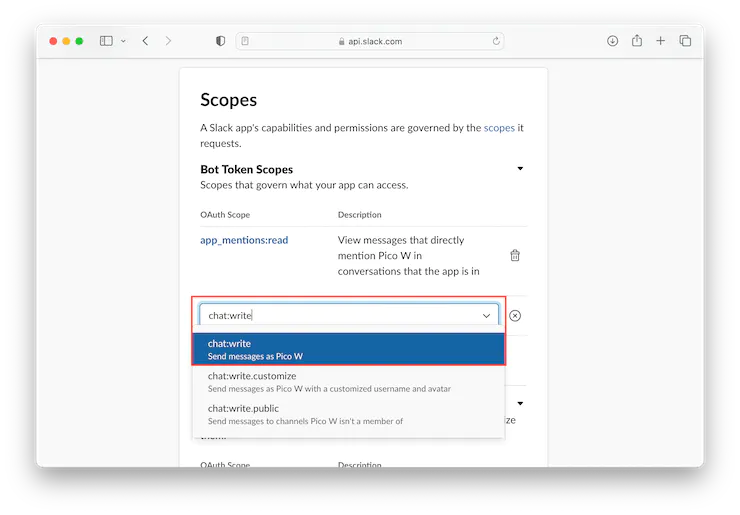
单击左侧的“OAuth 和权限”部分,向下滚动到“Scopes”部分,然后单击“添加 OAuth 范围”按钮。
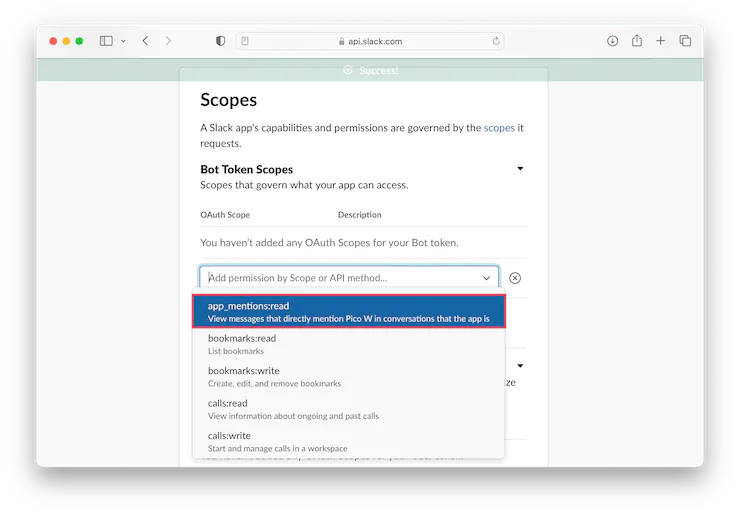
添加“app mention:read”权限。
添加“chat:write”权限。
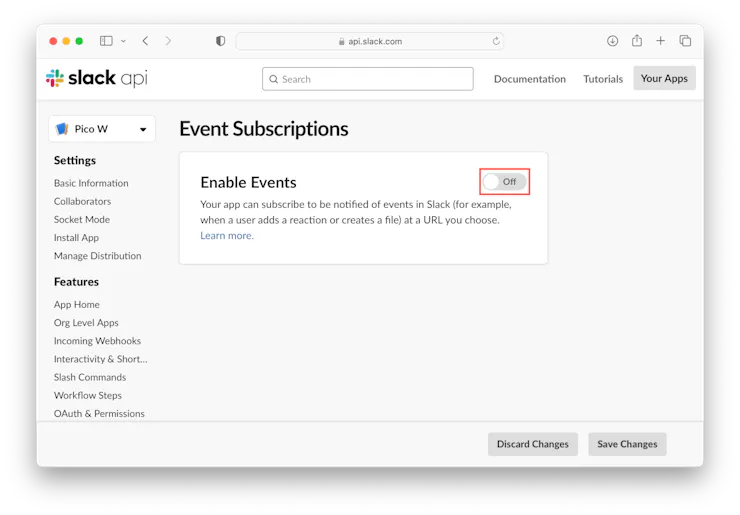
单击左侧的“事件订阅”部分,然后单击“启用事件”开关。
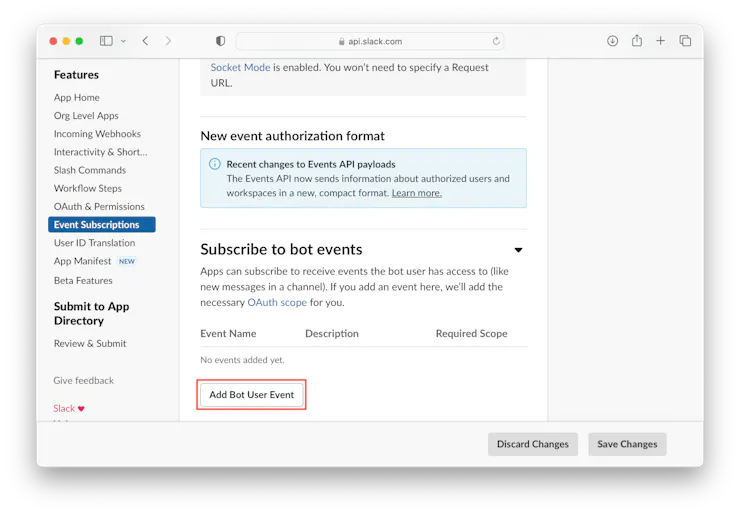
展开“订阅bot事件”部分并单击“添加bot用户事件”按钮。
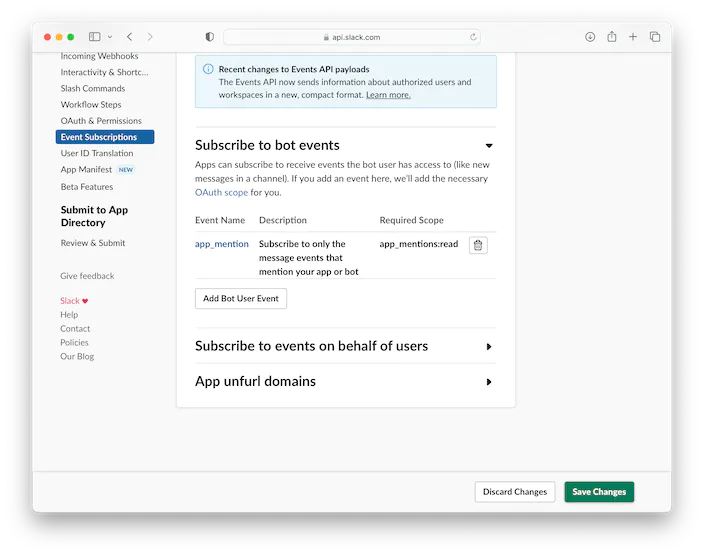
选择“app_mention”。

点击右下角的“保存更改”按钮。
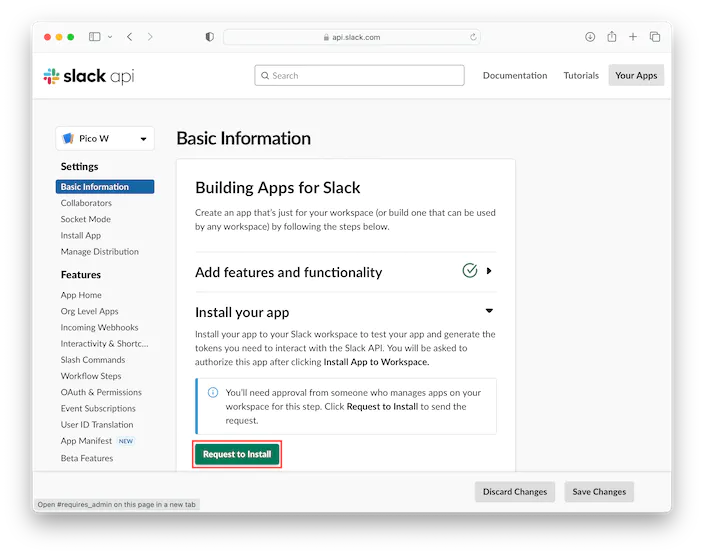
点击左侧的“基本信息”部分,然后点击“请求安装”按钮。
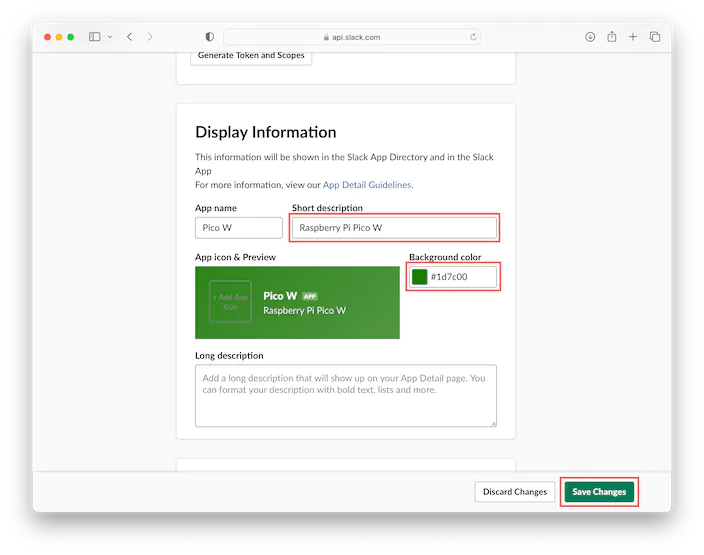
填写“简短描述”,选择“背景颜色”,点击“保存更改”按钮
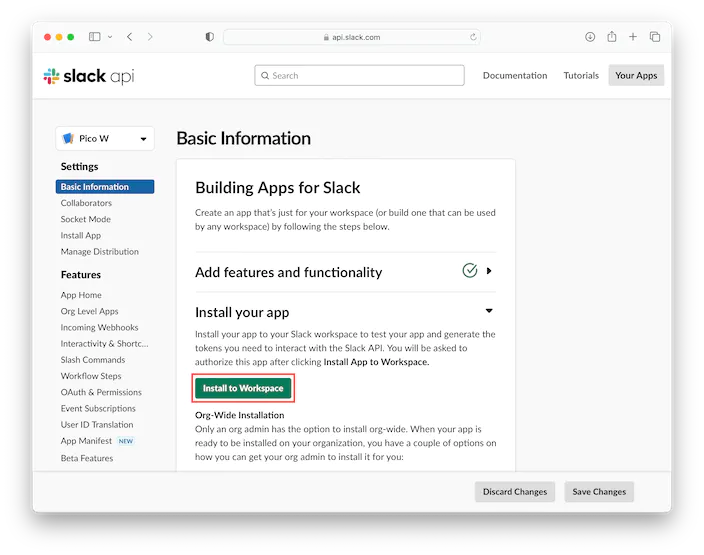
工作区管理员可以批准申请。然后转到“基本信息”部分,单击“安装到工作区”按钮。
安装完成后,单击左侧的“OAuth & Permissions”部分,滚动到“工作区的OAuth Token”部分,然后复制“Bot User OAuth Token”值并保存以供将来参考。
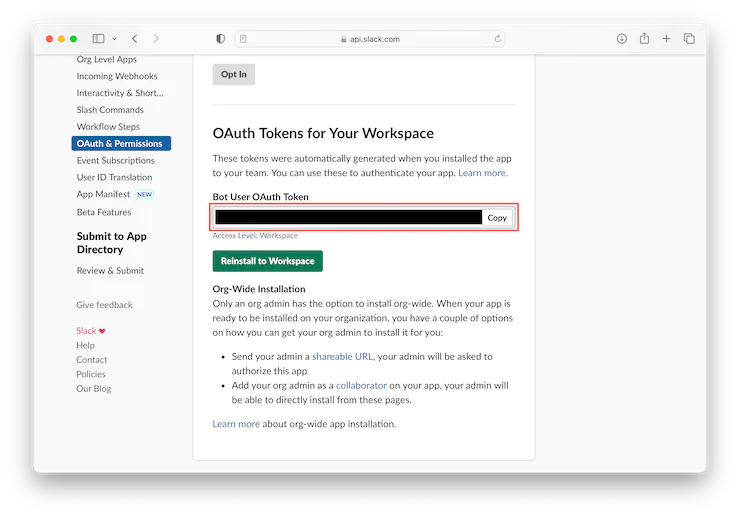
现在你有了一个应用程序级别的令牌值和一个Slack应用程序的Bot用户OAuth令牌值,可以在Raspberry Pi Pico W板上使用。
基于 MicroPython 的 Slack 机器人
MicroPython 为许多基于 Arm Cortex-M 的微控制器提供 Python 3 实现,包括 Raspberry Pi Pico W 板上的 Raspberry Pi RP2040。
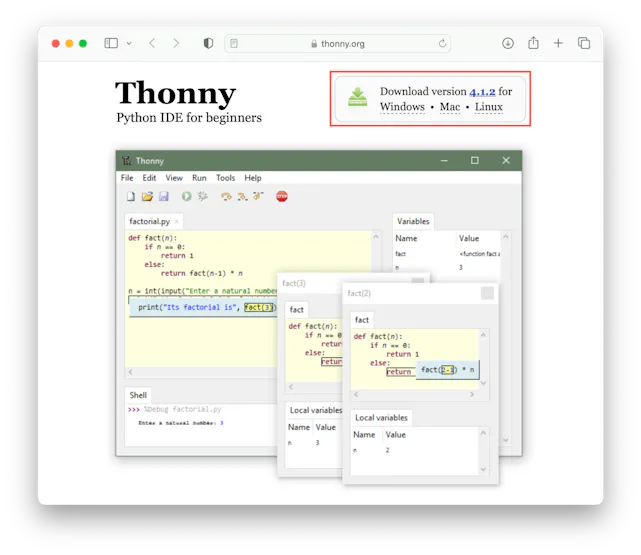
Thonny IDE 将用于安装 MicroPython 并将代码上传到 Raspberry Pico W 板。从 Thonny 主页下载适用于您的计算机的操作系统 (OS) 专用版本的 Thonny。在撰写本指南时,Thonny 4.1.2 是最新版本。
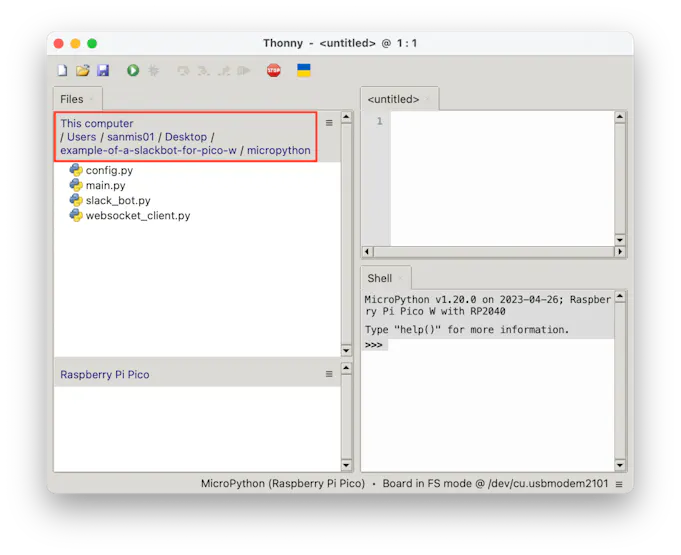
用Thonny刷好MicroPython以后,将 GitHub 中的代码下载到计算机上的文件夹。
相关代码:
https://github.com/IoToutpost/example-of-a-slackbot-for-pico-w
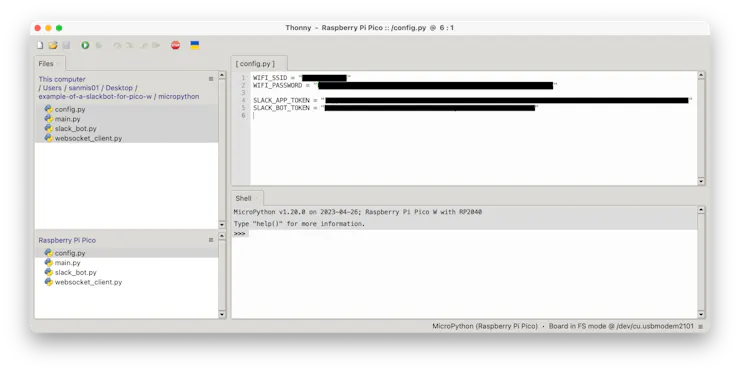
打开 Raspberry Pi Pico W 板上的 config.py 文件,填写 Wi-Fi 网络的 SSID 和密码,以及之前配置的 Slack 应用和机器人令牌。
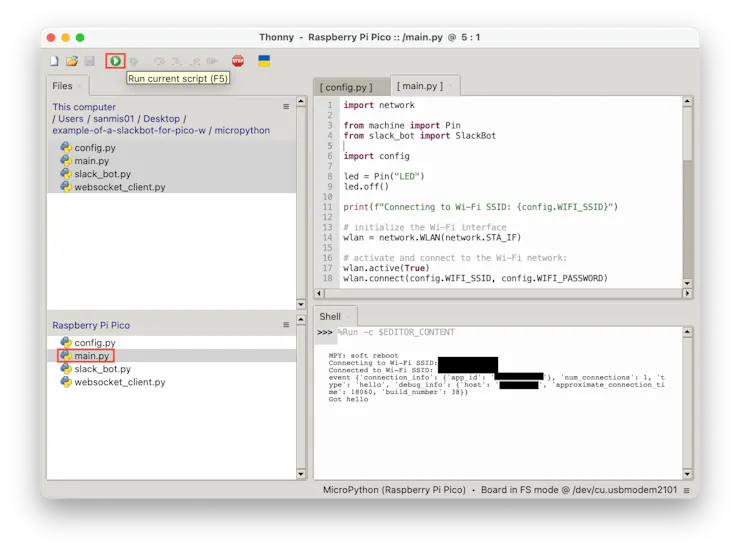
打开树莓派Pi Pico W板上的 main.py 文件,然后按绿色的播放按钮运行应用程序。如果一切配置正确,开发板现在将连接到您的 Wi-Fi 网络,然后连接到 Slack。
基于 C 语言的 Slack 机器人
对于 C 版本,以下库将与 pico-sdk 一起使用:
- FreeRTOS 内核 – 为网络堆栈提供实时操作系统 (RTOS)
- lwIP – 用于 TCP/IP 通信
- Mbed TLS – 用于 TLS 通信
- coreHTTP – 用于 HTTP 客户端
- cJSON – 用于解析和序列化 JSON 数据
使用 Raspberry Pi 的 Pico SDK 和所需的工具链设置您的计算机。有关更多信息,请参阅 Raspberry Pi Pico 入门指南。
在终端窗口中,设置 PICO_SDK 环境变量:
export PICO_SDK_PATH=/path/to/pico-sdk将目录更改为下载示例代码的位置,然后将目录更改为文件夹:pico-sdk
cd path/to/example-of-a-slackbot-for-pico-w

cd pico-sdk
创建一个构建目录,并将目录更改为该目录:
mkdir build

cd build
使用你的 Wi-Fi SSID 和密码以及 Slack 应用和机器人令牌运行,然后运行以编译应用程序:cmakemake
cmake .. -DPICO_BOARD=pico_w -DWIFI_SSID="<WIFI SSID>" -DWIFI_PASSWORD="<Wi-Fi Password" -DSLACK_APP_TOKEN="<Slack App Token>" -DSLACK_BOT_TOKEN="<Slack Bot Token>"
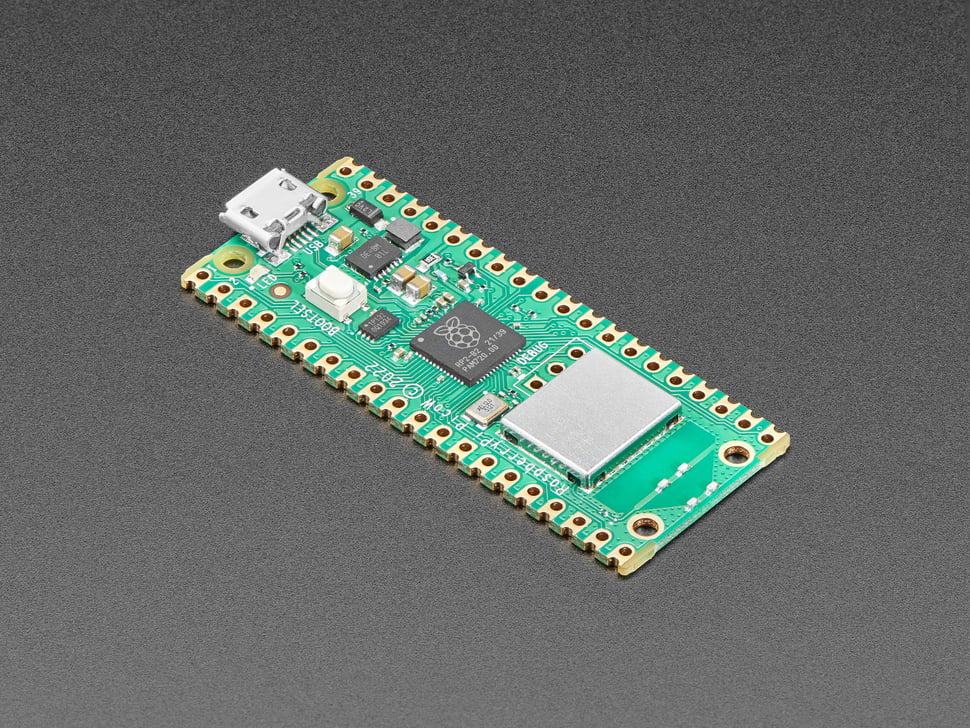
make按住 Pico 板上的 BOOTSEL 按钮,同时使用 USB 电缆将板插入计算机。
将文件复制到挂载的Raspberry Pi Pico启动ROM磁盘:picow_slack_bot.uf2
按住 Pico 板上的 BOOTSEL 按钮,同时使用 USB 电缆将板插入计算机。
将文件复制到挂载的Raspberry Pi Pico启动ROM磁盘:picow_slack_bot.uf2
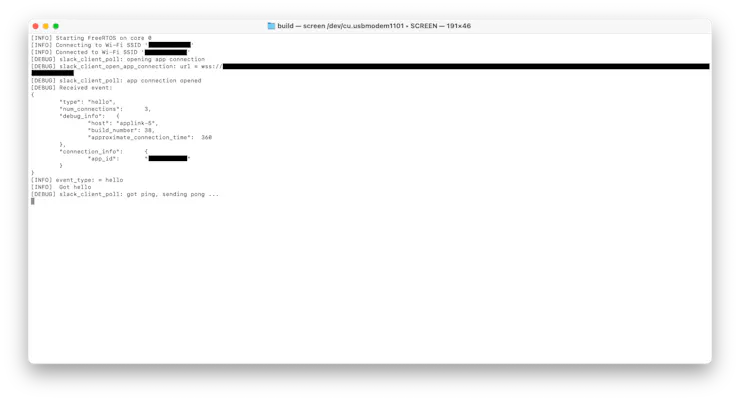
cp -a picow_slack_bot.uf2 /Volumes/RPI-RP2/.使用串行监视器应用程序(如屏幕)查看主板的 USB 串行输出,将 /dev/cu.usbmodem00000000000001 替换为主板的路径:
screen /dev/cu.usbmodem0000000000001如果一切配置正确,开发板现在将连接到您的 Wi-Fi 网络,然后连接到 Slack。
测试应用程序
在计算机上打开 Slack,并创建一个新的测试频道。在信息输入窗口中输入,然后点按绿色按钮或按回车键发送。@<name of Slack app> LED on

由于 Pico W 不在频道中,系统将提示您添加它们。点击“邀请他们”按钮。

被邀请后,开发板将点亮 LED, 然后回复消息告知状态。您也可以尝试发送消息以关闭 LED。@<name of Slack app> LED off

结论
本指南介绍了通过Raspberry Pi Pico W上运行MicroPython和C应用程序,来与Slack API发送和接收消息。
示例应用程序代码可以接收并处理消息文本,以控制板载 LED,然后将 LED 的当前状态告知用户。
你可以在自己的Raspberry Pi Pico W上尝试一下,然后在示例代码的基础上构建更多功能,从而将 Slack 扩展到物理世界。